Adobe Acrobat Reader on Chromebook: Install Guide & Web Access
![]() by
Gloria Brown
Post Updated: March 8, 2025
by
Gloria Brown
Post Updated: March 8, 2025
Adobe Acrobat Reader on Chromebook
Adobe Acrobat Reader is a versatile PDF app you can use on Chromebooks via an Android app, web platform, or Chrome extension, perfect for viewing, annotating, and signing PDFs.
Whether you’re reading documents or editing forms, Adobe Acrobat Reader offers multiple ways to work on ChromeOS.
Most Chromebooks since 2017 support Android apps, and the web and extension options work on any device.
This guide walks you through three methods to use Adobe Acrobat Reader on your Chromebook and highlights its key features.
Ready to manage your PDFs? Share your thoughts or contact us below.
How to Access Adobe Acrobat Reader on Chromebook
Adobe Acrobat Reader is available on Chromebooks in three ways: the Android app from the Google Play Store, the web platform at adobe.com, or a Chrome extension.
Not sure if your device supports Android apps? Check our list of compatible Chromebooks.
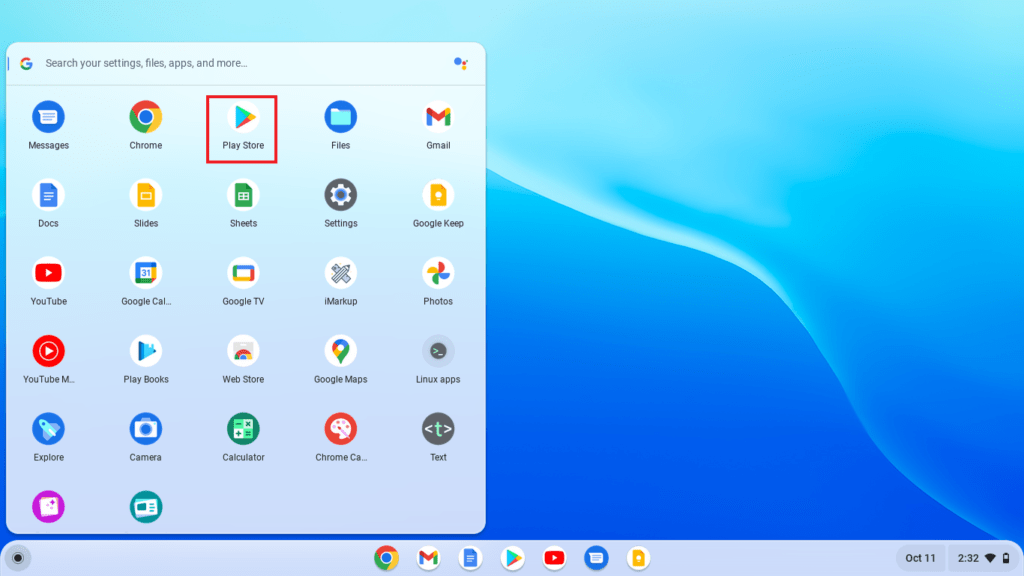
Method 1: Install Adobe Acrobat Reader Android App
- Open the Google Play Store on your Chromebook.
- Search for “Adobe Acrobat Reader” in the search bar.
- Click “Install” to download the app.
- Launch Adobe Acrobat Reader from your app drawer or shelf.
- Open a PDF to view, annotate, or sign.
Download Adobe Acrobat Reader (Google Play Store)
Quick Tip: 💡 Enable Liquid Mode for a smoother reading experience.
Why we prefer this method: The Android app offers offline access and robust features like e-signing.
Note: If the Play Store isn’t enabled, see our guide to activate it. A touchscreen enhances usability but isn’t required.
Method 2: Use Adobe Acrobat Reader Web Platform
- Open your Chrome browser on your Chromebook.
- Visit https://www.adobe.com/acrobat/online.html
- Sign in with your Adobe ID or create one for free.
- Upload a PDF to view, annotate, or sign online.
Access Adobe Acrobat Reader Web
Quick Tip: 💡 Link Google Drive for seamless file access.
Why we like this method: No installation needed, works on any Chromebook with a browser.
Method 3: Install Adobe Acrobat Reader Chrome Extension
- Go to the Chrome Web Store in your browser.
- Search for “Adobe Acrobat” and find the official extension.
- Click “Add to Chrome” to install it.
- Pin the extension to your toolbar for quick access.
- Open PDFs in Chrome by clicking links or dragging files into the browser.
Install Adobe Acrobat Extension
Quick Tip: 💡 Use the extension’s comment tools for quick annotations.
Why we like this method: Integrates directly with Chrome for fast PDF handling online.
What is Adobe Acrobat Reader About?
Adobe Acrobat Reader is a PDF management app launched by Adobe in 1993. On Chromebooks, it’s available via Android app, web, or extension.
It’s the go-to free PDF reader, with premium options for editing, competing with tools like Xodo and Foxit.
Key Features:
- View and annotate PDFs with notes and highlights
- E-sign documents with finger or stylus
- Fill forms with auto-fill options
- Convert PDFs to Word, Excel, or images (premium)
- Liquid Mode for adaptive reading
Adobe Acrobat Reader Screenshots

Adobe Acrobat Reader Getting Started Video
Adobe Acrobat Reader on Chromebook FAQ:
- Is it free? Yes, basic features are free; editing and conversions require a subscription ($14.99/month).
- Why won’t the app install? Ensure Android 9+ and 4GB+ RAM.
- Do I need a touchscreen? Recommended for signing, but not required.
- How’s it different from Fill & Sign? Reader is broader; Fill & Sign focuses on forms.
Adobe Acrobat Reader Chromebook Requirements:
- OS Version: ChromeOS with Android 9 or newer (app); any ChromeOS (web/extension).
- Device Specs: 4GB of RAM or higher, touchscreen recommended.
- Storage Space: 1GB or more (app).
- Internet: Required for web/extension and initial app setup.
For more help:
Explore more tools: Adobe Fill & Sign for Chromebook or Best PDF Editors for Chromebook
Discover more from Chrome Geek
Subscribe to get the latest posts sent to your email.